
Getting started
cv4vs Agents is not a fork of the CLI. It drives the real claude.exe, which you install
separately: the binary is never bundled. Version differences are handled by feature-detection, not
by pinning a CLI version.
Requirements
Section titled “Requirements”| Visual Studio | 2022 or 2026 (17.0 or later), Community, Professional or Enterprise, x64. Visual Studio on ARM64 is not supported. No workload is required. |
| Claude Code CLI | installed separately; see below |
Install
Section titled “Install”-
Install the Claude Code CLI.
Terminal window winget install Anthropic.ClaudeCodeTerminal window npm install -g @anthropic-ai/claude-codeOther platforms and installation methods are in Anthropic’s official setup guide.
-
Install the extension from the Visual Studio Marketplace, or search cv4vs Agents in Extensions → Manage Extensions inside the IDE.
-
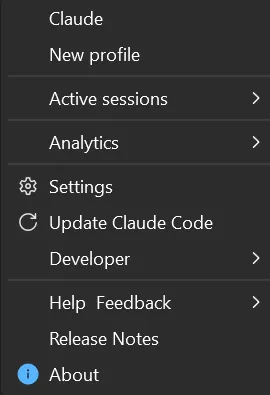
Open a pane. In Visual Studio: View → cv4vs Agents → Claude. It opens a Chat pane. For the terminal instead, use the arrow beside New on the pane’s toolbar and pick CLI, or set Default new session to
Cliunder Options → General: the View menu then opens CLI panes.
No CLI installed? The pane says so and links to the setup guide, instead of failing silently.
Sign in
Section titled “Sign in”The extension does not handle login: the CLI does. Log in the normal way, from a terminal: run
claude (or open a CLI pane) and follow the CLI’s own /login flow. The extension never sees
or stores your credentials.
To use a provider other than Anthropic, see Another provider.
Your first message
Section titled “Your first message”Type in the chat, or open a CLI pane for the interactive terminal. The IDE tools (navigation, diagnostics, debugger) are wired up automatically: nothing to configure.
The file open in the editor, and your selection, ride along with the prompt: a chip above the composer shows what is going out, and one click turns the sharing off. See Editor context.
Preview builds
Section titled “Preview builds”Release candidates are tagged vX.Y.Z-rcN and published on the
Releases page with the .vsix attached;
they are not on the Marketplace, which takes neither a suffixed version nor a second upload of one
already published. Double-click the file to install.
Two things to know before trying one. They receive no automatic updates: a .vsix installed by
hand has no gallery behind it to check. And every preview of a release carries the same version
number: the -rcN suffix lives on the tag, because a VSIX manifest version is digits only, so
installing rc2 over rc1 is refused as already installed. Uninstall the previous preview first,
from Extensions → Manage Extensions.
A preview says so: every pane carries a red strip, Pre-release X.Y.Z-rcN: not for production use, and the pane’s More menu gains the WebView developer entries.
Stable releases carry no .vsix: install them from the Marketplace, where updates arrive on their
own.